
Following my failed attempt to setup a stable haxie with my previously purchased Gigabyte GA-Z87N-WIFI motherboard and my fast Haswell CPU, despite other users not having any reported issues (per my search results on the net), I decided to ditch it and go for something different. The price point and budget allowed me to choose between an ASUS and MSI branded mATX motherboard, so I went for the MSI Z97i-AC board, as it was offering DisplayPort that I really want to check out. Please note, it’s not the “Gaming” variant, which costs more (for some reason).
I installed the Intel Core i7-4790K processor (4.0 GHz), hence still in need of a Z97 chipset that can support such unlocked CPU. Additionally, I used again my 2 Corsair Vengeance (Low Profile) memory modules (1600MHz CL9), totalling 16GB of dual-channel RAM (they support Intel XMP v1.3, too). No dedicated graphics card, since I planned to use the embedded Intel HD Graphics 4600 of the CPU (more like a Mac Mini). The cooling is performed by a Skythe Ashura, for really silent computing (and some over-clocking, too).
After assembly, I booted the computer and went straight to the BIOS update menu, flashed it with latest v4.9 firmware (as found on MSI’s own website). With some parallel research on my favourite forums, the seemingly typical BIOS settings are really minimal, summarized below:
- Update to the latest available BIOS from manufacturer!
- Load “Optimized” Defaults;
- Disable “Intel VT-d Technology” completely (otherwise, OS X won’t boot);
- Disable “CFG Lock” completely (very critical, won’t boot either);
- Enable “Extreme Memory Profile (XMP)” to boost performance.
- Disable “Serial (COM) Port” completely (not really needed, but it’s just me);
- Disable “Full Screen Logo” option (there’s a good reason for it, I will explain);
- Set to “IGD” as the graphics adapter to initialize (if only using HD Graphics);
- Check that “Intel C-State” is enabled (check with your CPU specifications);
- Finally, check that “C1E Support” is enabled (check with your CPU specifications).
Optionally:
After this handful of changes, go to the main screen and opt to “Save And Reboot” the computer. You are done!
VISUAL GUIDE TO “MSI Z97i-AC” BIOS SETTINGS
Since I need to keep a record of this for my own reference, too, here is the visual guide of minimal BIOS settings to run OS X via Chameleon or Clover.
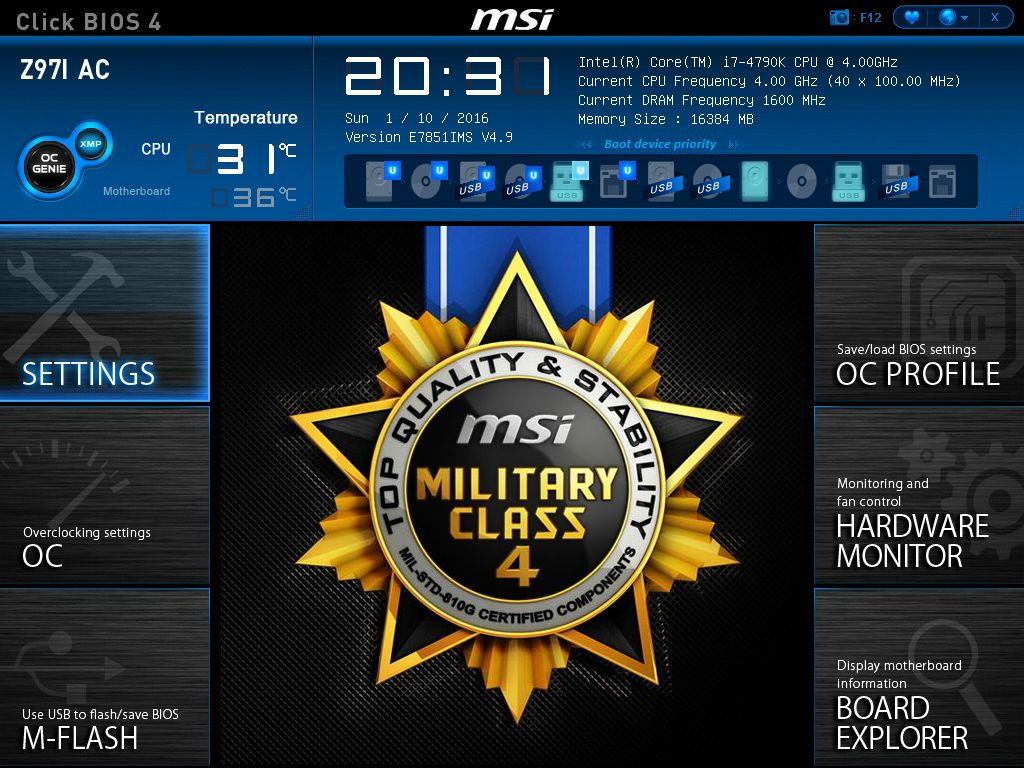
Welcome to the main BIOS screen of this motherboard, freshly updated to latest v4.9 firmware. Click on “Settings” button (left, top) to start.
1. Load Optimized Defaults


We need to be sure to start from “scratch” so loading the defaults is the first step to every successful Hackintosh.
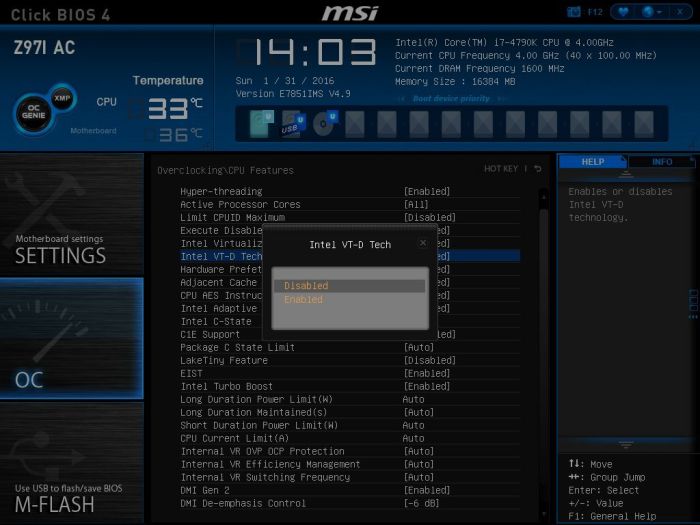
2. Important “CPU Features” to disable!
I wasn’t aware of these two settings and how critical they are, for recent generations of motherboards, especially “CFG Lock”. I had read somewhere that it’s preferrable to disable Intel’s “VT-d” feature in BIOS (if your CPU supports it) as there doesn’t seem to be any Mac OS X applications that use it. Most of the times, this setting didn’t allow the computer to properly boot OS X, either. In any case, recent iterations of Chameleon and Clover allowed to safely bypass this BIOS setting by including dart=0 in the kernel flags and settings. Use this only if you are sure that you need it.
Over on MacBreaker, one reads:
dart=0
Disables the VT-d virtualization technology built into certain Intel processors. For Hackintoshes, VT-d is pretty useless; virtually no Mac OS X applications use it (virtualization apps like Virtualbox tend to use the alternative VT-x technology, instead), and certain Hackintosh motherboards have been known to crash in Mac OS X when VT-d is enabled.
Of course, disabling “VT-d” for starters, allows to setup the haxie with minimum of effort and bootloader settings. Later on, if someone really needs it, using kernel flag “dart=0” during boot time seems to solve the issue. I personally haven’t tried it, but it’s all over the forums.
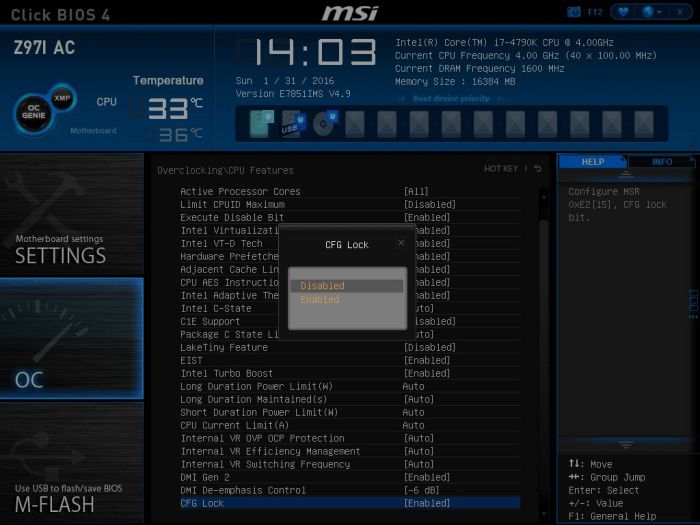
The “CFG Lock” is a setting that is quite new in UEFI BIOS, or appears in some manufacturers. For example, I never encountered it on my Gigabyte GA-Z87N-WIFI BIOS settings, despite using this same CPU. Nevertheless, it seems critical and related to Haswell’s power management as nearly all UEFI BIOS versions seem to “lock MSR 0xE2”. Disabling it is crucial, especially for running OS X 10.10 (Yosemite) and booting stock kernel. What does this “locking” do? All I can find is that it locks cuurent C-State until the next reset occurrs. Beats me, but OS X doesn’t like it!
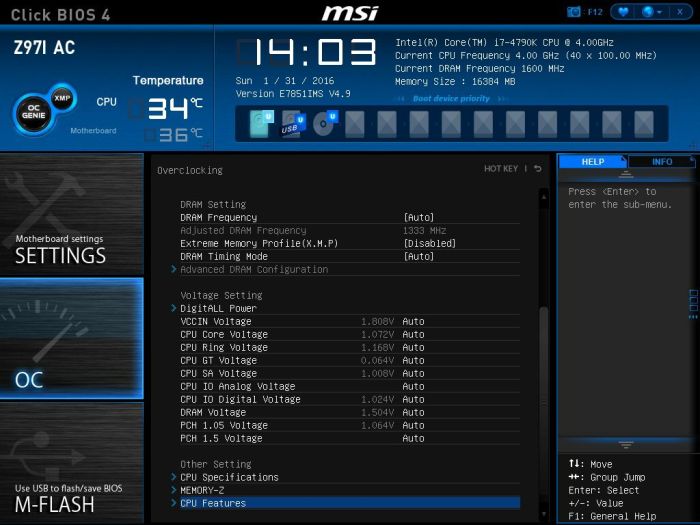
3. Get that RAM in optimal speed
One of the last things to do, for better performance, is to enable the XMP profile of the memory modules if they support it (please check your specifications). I purchased these Corsair RAM modules knowingly that they support XMP, so I wanted to set them to run at 1600MHz.
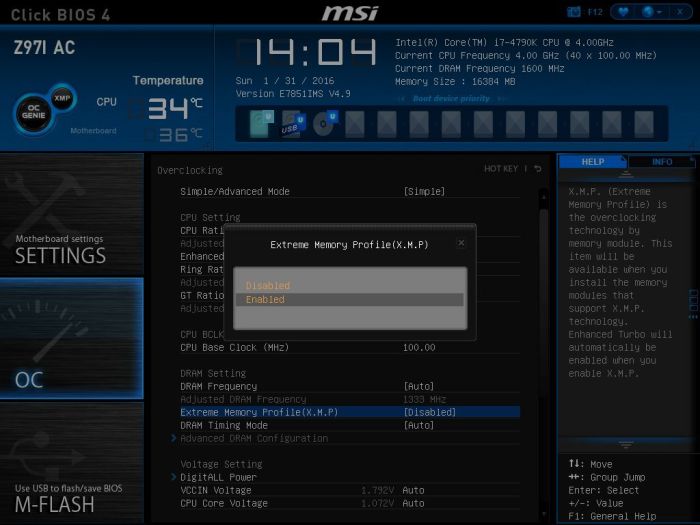

Having XMP as part of the hardware specifications is nice, but not needed. Nevertheless, if someone is going to buy new RAM modules anyway, better get the full monty as price-difference is too small compared to other non-XMP modules, for same total capacity.
4. Save settings and reboot!
Pretty straight-forward action…
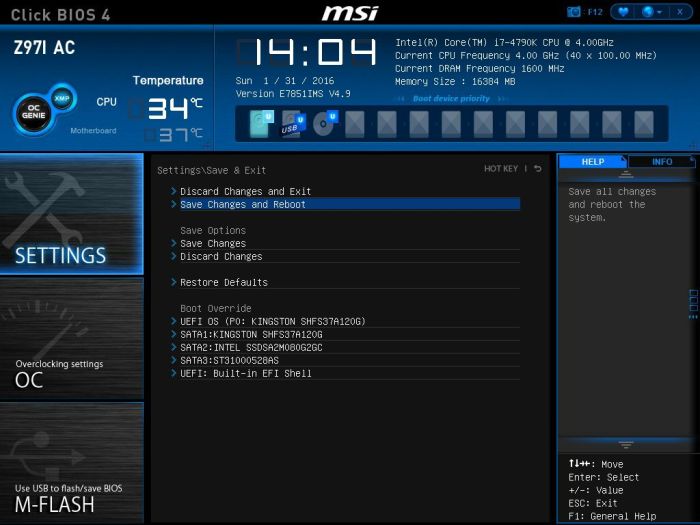
Now we are ready to run our Mac OS X USB Installer that we previously created on another computer running OS X! More on that, coming soon. I will post my optimal Clover flags, too.
OPTIONAL “MSI Z97i-AC” BIOS SETTINGS
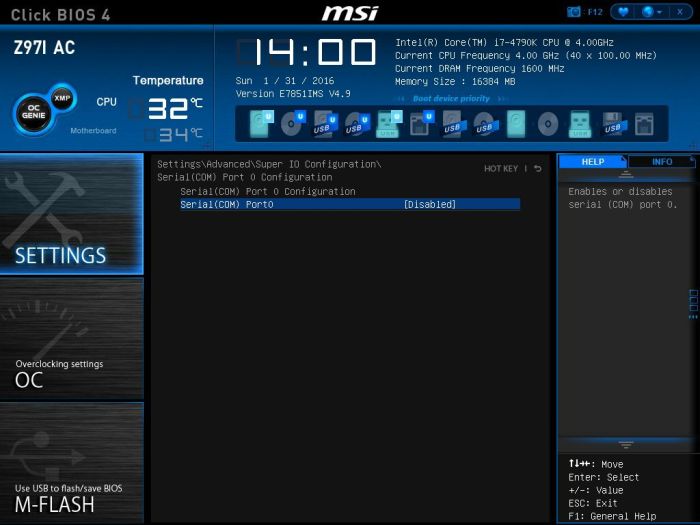
5. Disable Serial (COM) Port
I agree, these are my own personal additions to the guide, however, the serial (COM) port is nowhere needed on Mac OS X and disabling it will prevent it from appearing in the “Network” interfaces of “System Preferences” as I want my haxie to look as close to a real Mac as possible.


6. Disable that Full Screen Logo
The reason I always disable the fancy boot screen logos of my Hackintosh efforts, is really practical. If the computer running OS X sleeps, restarts or resets and the boot screen then shows the logo, this means that some process or kext failed, resulting to CMOS reset. This was particularly evident in Mac OS X 10.9 (Mavericks) without patching the ACPI kext accordingly, causing CMOS reset every time the computer went to sleep and woke up.
![]()
![]()
7. Initialize Intel’s integrated graphics first
If you don’t plan to use a dedicated AMD or NVIDIA graphics card, but only stay with Intel’s own integrated graphics controller (Intel’s Core i7-4790K embeds the HD Graphics 4600 controller, perfect for a Mac Mini emulation) then why not telling BIOS to initialize the embedded graphics by selecting “IGD” first?
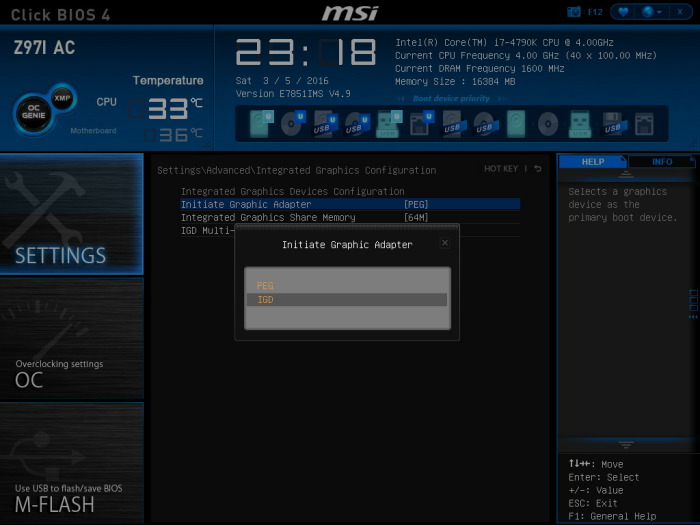

I have discovered via trial-and-error that on my Hackintosh, changing the “Shared Memory” setting from 64MB to anything else, crashes the computer during boot-time (on both Yosemite and El Capitan). I would therefore recommend to not alter the value that comes with “Optimized Defaults”!
8. Check and set advanced CPU features
Finally, a couple of advanced optional BIOS settings that we could enable, have to do with the so-called “C-States” and the “C1E” feature (Enhanced ‘Halt’ State) that highly depend on the Intel processor used.

In order to achieve optimal speed-stepping and better power conservation, CPUs now include several such “power modes” that are collectively called “C-States”. With more recent Apple models and Intel processors, there is a growing need to enable such “modes” either by purchasing a CPU that already exists in released Apple computers (so-called “Vanilla”), or to generate such needed information using Piker Alpha’s excellent script (I know, this is for advanced users, but I need to mention it).
The basic idea of these modes is to cut the clock signal and power from idle units inside the CPU. The more units you stop (by cutting the clock), reduce the voltage or even completely shut down, more energy you save, but more time is required for the CPU to “wake up” and be again 100% operational. These modes are known as “C-states” or “C-modes”. They are numbered starting at C0, which is the normal CPU operating mode, i.e. the CPU is 100% turned on. The higher the C number is, deeper is the CPU sleep mode, i.e. more circuits and signals are turned off and more time the CPU will take to go back to C0 mode, i.e. to wake-up.
As you can see from the above definition, such feature is directly affecting the performance (and also ‘sleep’) of the Hackintosh, so use this feature only if you are comfortable with Hackintoshing.
Similarly, the “C1E” feature is a power management state that allows the processor to reduce power beyond just the cores. If you plan to use a standard Intel processor with or without Piker Alpha’s SSDT script support, you can enable this in BIOS to achieve better power management.

From various posts that deal with O.C. (i.e. over-clocking) I read that this feature must be absolutely disabled if you plan to over-clock your Intel processor beyond its factory setting, with the absolute need for Piker Alpha’s SSDT script generated to fit your needs.
A nice and highly useful tool to see if your Hackintosh is achieving these power states, is called Intel Power Gadget and I strongly recommend you download and install it on your Hackintosh!
SOME FINAL POINTS
Modern UEFI BIOS versions have important settings enabled by default — that weren’t so, in the past. In the case of the MSI Z97i-AC, I had no more work to do, but it’s always good to check them and remember them, so we never forget.
- HPET must be enabled and set to “64-bit” mode, if such setting is available;
- AHCI must be the chosen SATA Control Mode of your setup;
- Both EHCI and XHCI “Hand-Off” are usually left enabled, depending on your board and chipset;
- Similarly, XHCI Mode should be left to Auto, if such setting is available (avoid “Smart Auto”);
- ACPI Suspend Type must always be in S3 (STR) mode;
- Check that Secure Boot Mode is disabled, or UEFI Mode is set to “Other OS” (i.e. not Windows 8 mode)
END OF PART ONE

You must be logged in to post a comment.